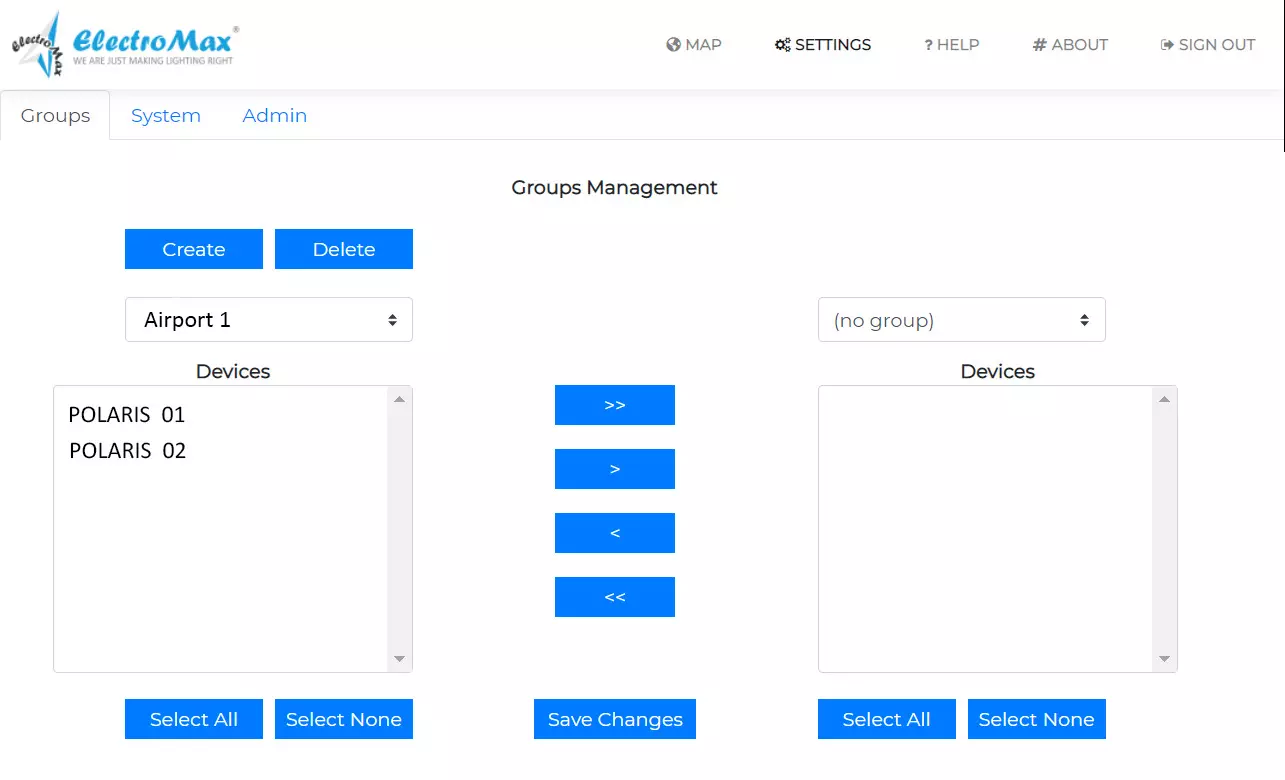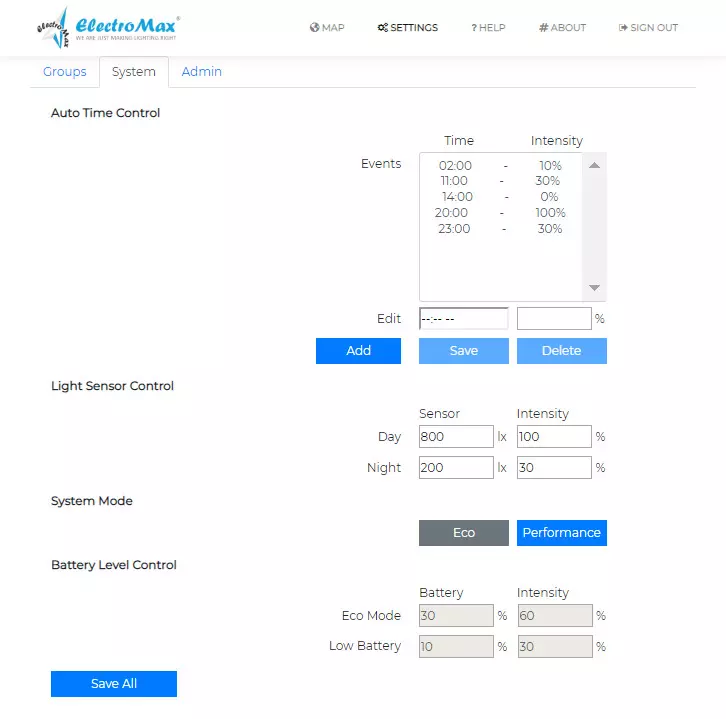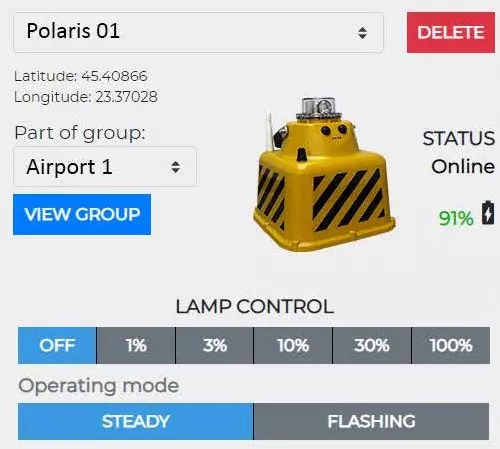
The POLARIS meets the standards of International Civil Aviation Organization (ICAO) Annex 14, Federal Aviation Administration FAA (specifically: FAA AC 150/5345-46D; FAA AC 150/5345-50B for portable runway lighting).
Category: Polaris System
POLARIS WEB CONTROL is a lightweight, fully-featured, quick and easy to use web interface for controlling and monitoring hardware activity of an entire airfield (or other medium to high range spatial distribution facility) lighting system. It requires no installation or special system requirements, and only needs a modern web browser to provide full capabilities, on any desktop, laptop, tablet or mobile device.
It relies on a fully functional hardware setup provided by the lighting system manufacturer (please consult hardware and network setup documentation), and the local network infrastructure of the facility.
It enables full system monitoring in real-time, of the entire spatial distribution of the hardware in the field, and their individual status, operation mode and problems, as well as individual, group, and overall system control of the,hardware in the field. It also provides automatic system control and schedule, based on time events or lighting conditions in the field.
The POLARIS can be used as a standalone fitting or as part of a complete Transportable Runway Lighting Kit. The POLARIS Lighting kit is used to set-up a temporary or semi-permanent lighting system in order to allow aircraft to land on grass strips, frozen lakes, roadways or as emergency runway lighting on major Airports.
Using optional IR LED sources, the system can also be NVG compatible.
Main Map View
The main (Map) view holds all the relevant information of the real-time overall system and individual hardware status, as well as the controls to access and control the system, device groups, and individual hardware units.
The major parts of the user interface and controls are outlined and described below.

1. Main Application Navigation Bar
Allows navigation between the Main (Map) View of the application, and other secondary sections, like SETTINGS, HELP, ABOUT, and functionality like SIGN OUT; always visible, holds the application logo. Application always loads and starts in Main (MAP) View, navigating to other sections won’t close or stop the main view operation.
2. Application Status Bar
Displays critical summary information on the current system and hardware status (a), current system operation mode (b), and allow overall system control of the hardware (c) like switching On / Off, setting lighting level, enabling and disabling auto / scheduler functions. Clicking on the status bar will expand / collapse the Notification Area below.
3. System Notification Area
Scrollable and collapsible area that presents all current / actual system and hardware notifications, either informational, warning messages, or operational errors. Errors that have been reviewed can be manually dismissed / removed from the system here. The overall color of the status and notification areas is determined by the type of notifications present in the queue. Default / no issues is green, when only some warnings are present it is yellow, and when errors are present it is red.
4. Device Details Pane
The main area that presents the current status and details of an individual hardware device (a), as well as presenting operational status and allowing individual control (b), and presenting group operational status and allowing group control (c). This always presents information for the device currently selected on the Map View, and all the details and operational status are in real-time synchronization with the actual hardware status in the field. All the operational commands to the devices / groups are also sent from this view.
5. Application Map Area
This is the main view of the application, containing a Google Maps control, on which all the hardware devices (a) are placed according to their real-time reported location from their GPS sensors. The currently selected device has and additional Info Popup open (b), presenting all its reported field data, besides being shown in the Details Pane. All the hardware devices registered with the system are initially visible on the map, all usual maps operations like zooming, panning, etc. plus additional device groups filtering, device error highlighting, etc. are available and described below.
Map Area
The Map Area is a fully featured Google Maps area, hosting all the hardware devices currently registered in the system, in their respective locations as reported by their GPS sensors. It is the application’s main access point for selecting hardware devices for monitoring and control.
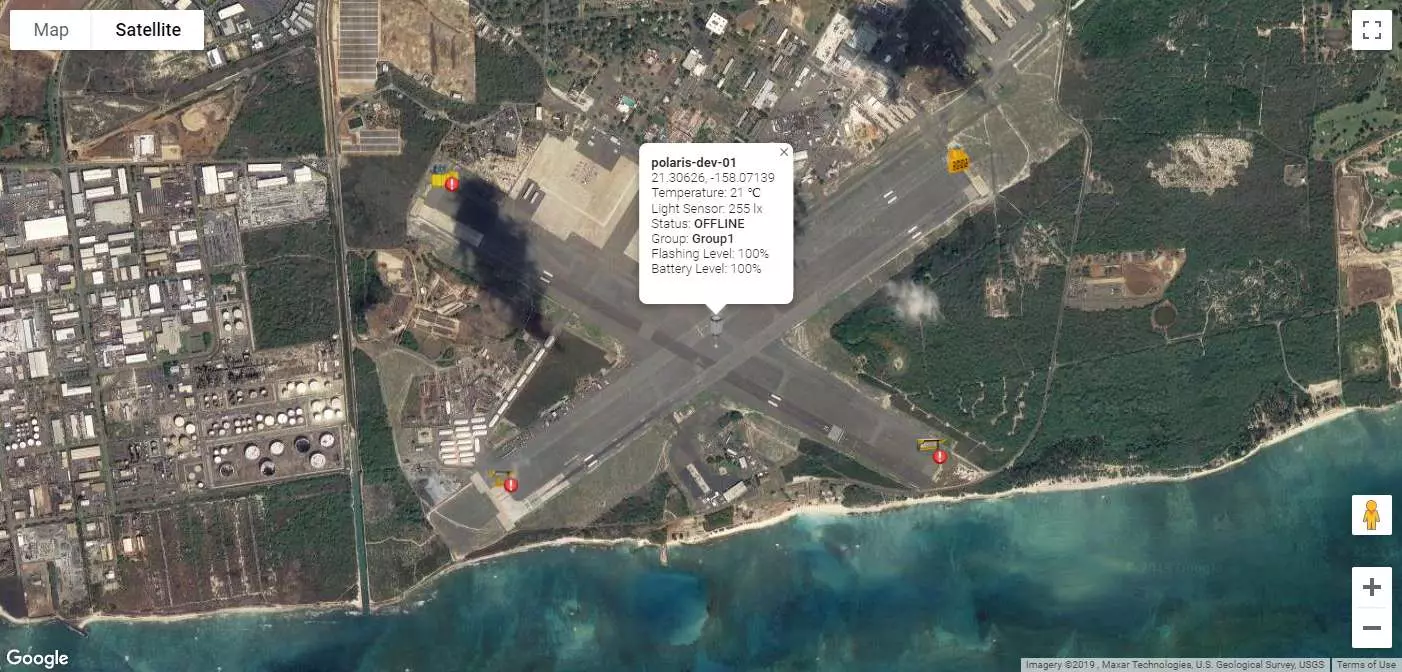
Upon application startup and initialization, the Google Maps control is automatically centered and zoomed in the current devices location, such as all currently present devices will it in the initial map boundaries.
Initially the map is in Satellite mode, but the user can interact with it as with any Google Map, alter its mode and layers, zoom level, scroll and pan, etc. The application will remember the last used map mode (Map / Satellite / Terrain, etc.) on subsequent runs / loads and between browser sessions, but will always center and zoom on startup on the current devices location.
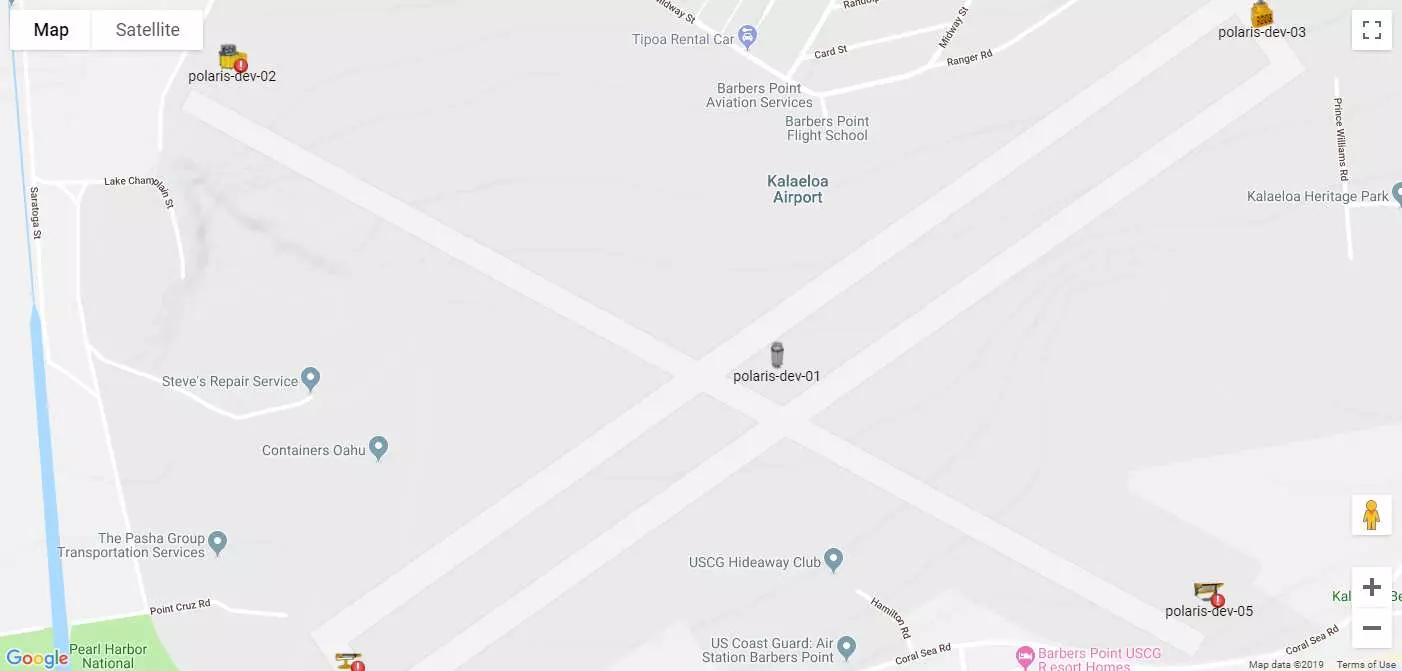
At higher zoom levels (finer detail) each device will also display its name label under its map marker. At lower zoom levels the device name labels are hidden from the map to avoid cluttering the map. User can freely zoom the map in and out, pan, scroll, maximize, change view and mode, etc. using normal Google Maps controls.
When no devices are reported by the system at application startup and initialization, the map will be initially centered in a neutral location, at (0, 0) latitude / longitude, in the middle of the ocean. However, when the first device is detected / registered by the system, the map will automatically re-center on its location.
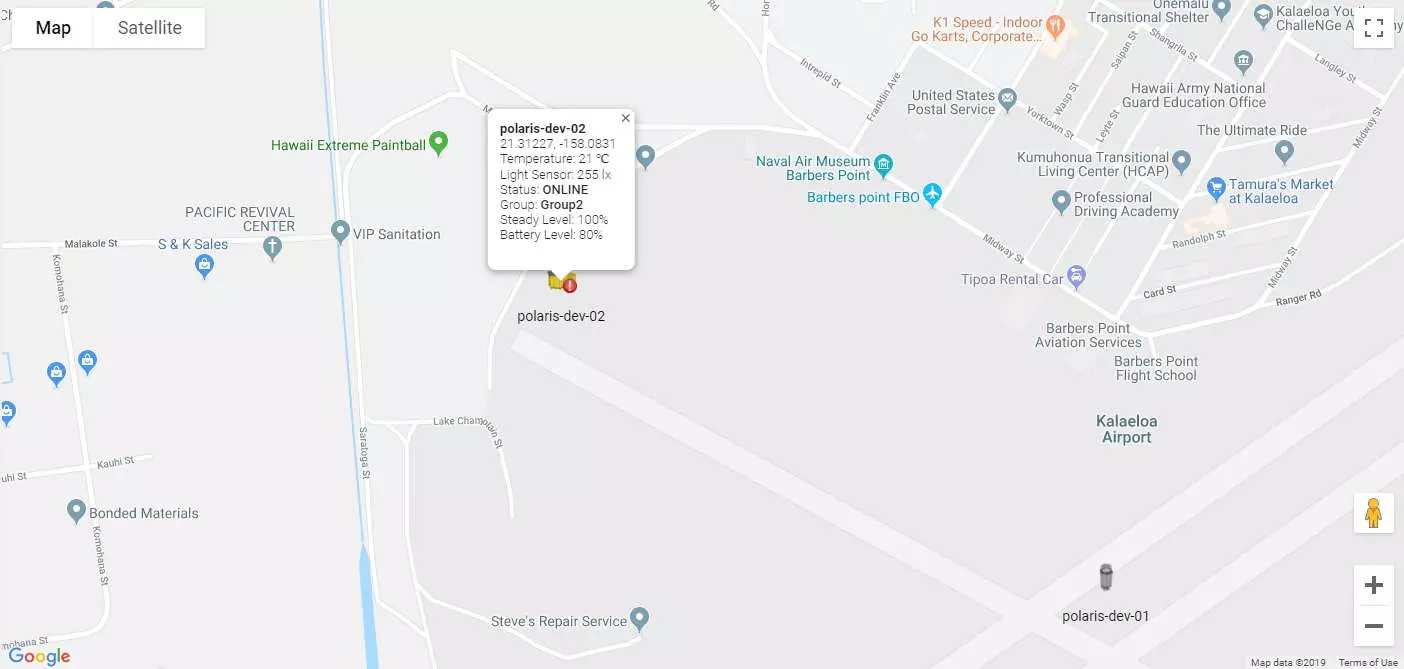
Each hardware device will be represented by a single marker symbol on the map, having the exact graphical representation of the actual device in the field. When selected, an Info Popup window opens from that device marker, displaying all the relevant information reported by the device from the field. The Info Popup can be closed when no longer needed by clicking its close marker, or by clicking anywhere else on the map. It will close automatically when another device is selected.
When a device is selected on the map, all its technical, logical and operational details are displayed in the Details pane adjacent to the Map Area. All further monitoring and operational tasks are performed from that device detail view. The Map Area only provides an overall system view, some field information, and the main access point to select individual devices / groups for further tasks.
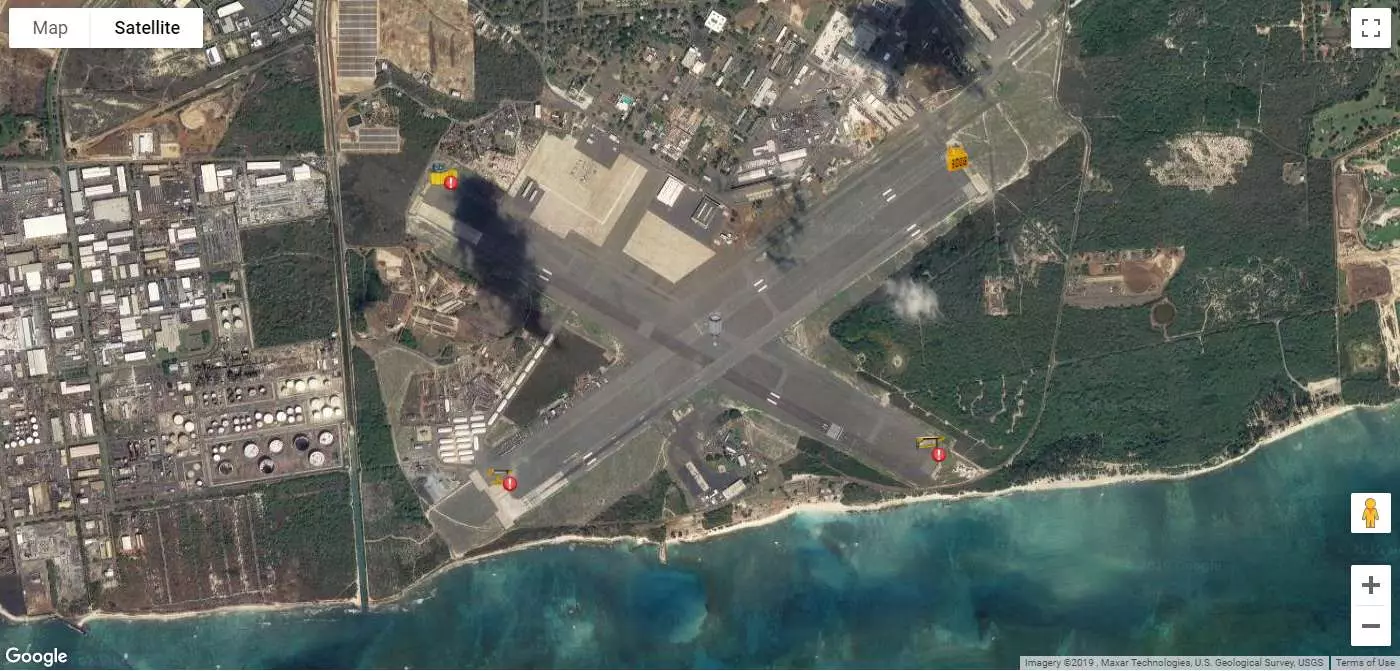
Device markers on the map, besides signaling the lamp type by their graphic, also signal the current hardware status:
- a device functioning normally, part of a valid group, will be just a steady graphical representation of the device in the field
- a device registered with the system, that is currently offline / undetected by the system, will be a steady grayed out graphical representation
- a device functioning normally, that is not part of any group, will be a steady graphical representation, with an exclamation mark in a red dot
- a device that reported warnings or errors will also display the exclamation mark in a red dot, but will also continuously bounce on the map to draw attention on the error condition
Error conditions can be further inspected and resolved by selecting the respective red dot / exclamation mark / bouncing markers, reviewing and clearing their notifications, etc.
Radio Control System
The system uses bidirectional RADIO communication to control and monitor each light fixture.
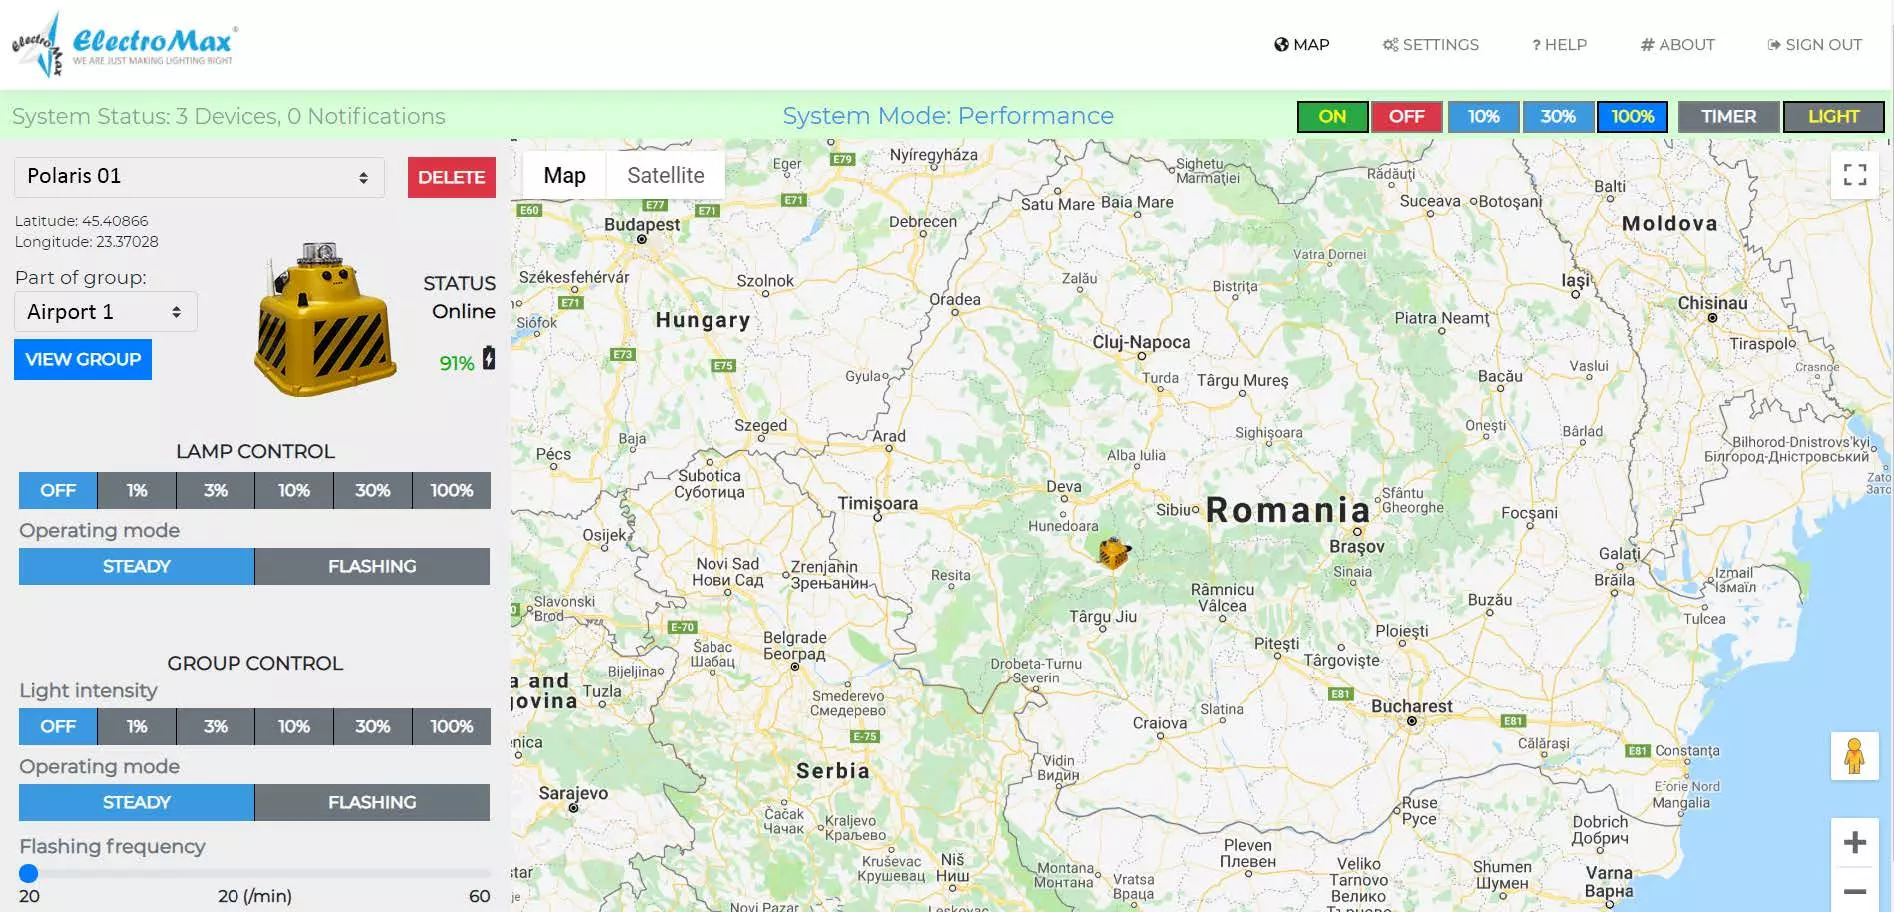
The software allows the user to: check the battery status; see the estimated time remaining until full discharge; change the brightness step; change the operating mode to steady or flashing. The fixtures can be controlled individually or in groups.
Users can check the battery level and status of the battery. If the battery is low, the intensity can switch automatically to the lower level, in order to extend the autonomy. A software routine can be created, allowing to turn units ON, OFF or to change the status during the day or according to a preset calendar.
